This page is specifically intended for a Conductor who has installed just the recommended hardware (including WiFi). If you are a Tinkerer or Engineer or have installed some of the additional, or different, hardware from that recommended for a Conductor then we suggest that you look at the EX-Installer page for the full instructions.
Once you have assembled your EX‑CommandStation hardware you need to load our software onto it to make it usable. To make it as simple as possible we have created the EX‑Installer app.
Instruction for Windows, Mac OS X, and Linux (including the Raspberry Pi)
Connect your EX‑CommandStationhardware to your computer via USB. Make sure your USB Cable is connected from your computer to the EX-CommandStation. Make sure no other programs (like the Arduino IDE) are using the same USB port.
Antivirus Software You may need to turn off your antivirus software before you try to install. Sometimes our software gets blocked by antivirus apps. If you see any errors on the install screen, this is usually the issue.
Find the folder in which the EX-Installer-Win64.exe or EX-Installer-Win32.exe was saved. Generally this will default to downloading to the downloads folder but your browser may be configured differently.
RunEX-Installer-Win64.exe or EX-Installer-Win32.exe or EX-Installer-Win32.exe
Note: depending on the configuration of your computer the ‘.exe’ may or may not appear. This is not of concern.
For Apple macOS:
Open a terminal window and navigate to the that folder that you downloaded the file to. e.g.: cdDownloads
Enter the following command to tell the OS that it is an executable: chmod+xEX-Installer-macOS
Run the installer with the following command: ./EX-Installer-macOS
For Linux:
Right-click on the file, go to Properties, then the Permissions tab, and check “Allow executing file as program”
Open a terminal window and navigate to that folder
Run the installer with the following command: ./EX-Installer-Linux64
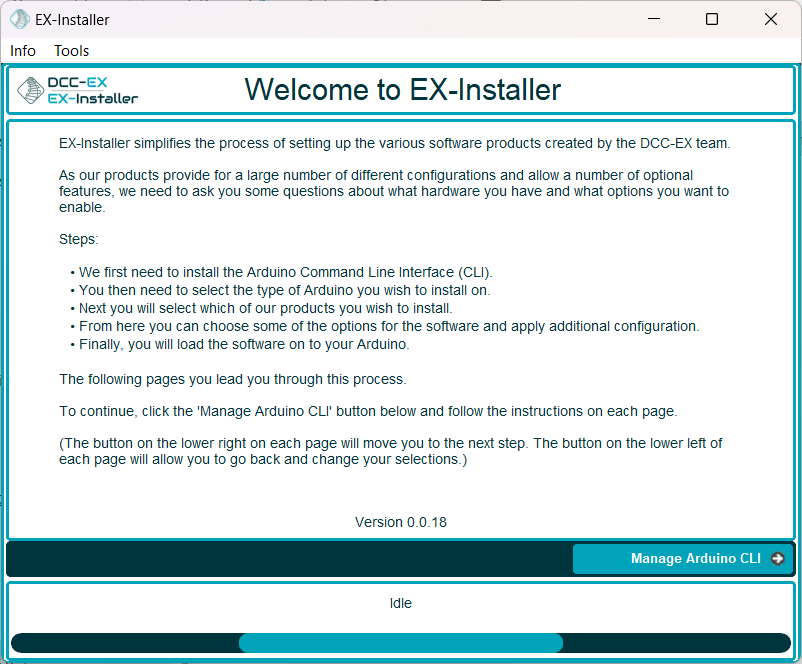
This screen allows you to install or update the Arduino Command Line Interface (CLI).
We use the Arduino Command Line Interface (CLI) to upload the DCC-EX products to your Arduino.
If you have not installed the CLI previously you must have Arduino CLI installed to proceed, simply click the Install Arduino CLI button if it is showing.
If you already have the Arduino CLI installed, it is recommended that you refresh it periodically (e.g. weekly) to ensure support for the various device details are kept up to date. To refresh the CLI, simply click the Refresh Arduino CLI button.
If you are using the recommended Mega hardware, you should not need to adjust the other settings on this page.
Once the CLI is installed, To proceed, click the Select your device button.
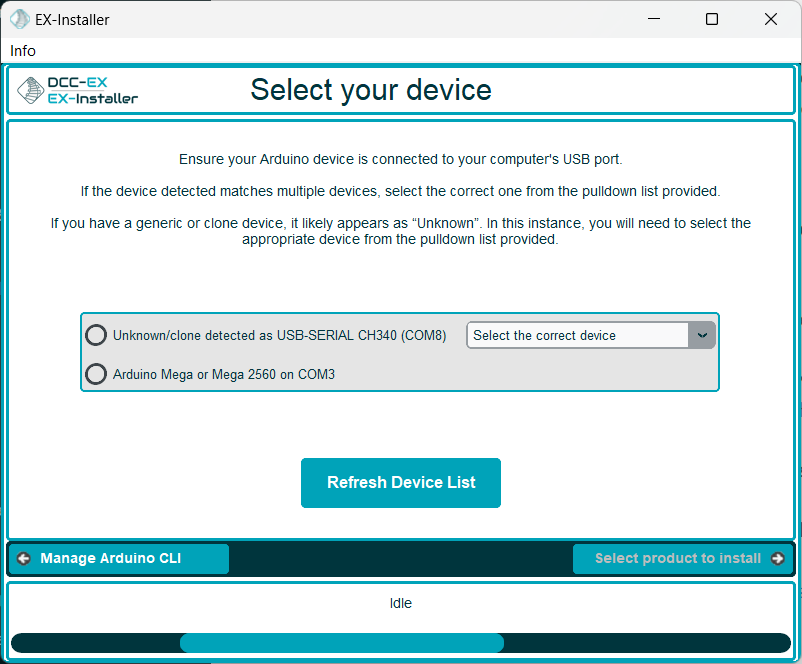
On this screen you will need to a) select the type of device you wish to load the EX‑CommandStation software onto, and b) the USB port you have connected the device to on your computer.
EX‑Installer will attempt to work out both of these for you, but it may need assistance.
Click on the Scan for Devices button.
No Devices Found
After you have clicked on the Scan for Devices button, if you see No devices found to means that you either a) have not connected the device to the computer, or b) the device was not recognised by the computer.
If you have not connected the device, connect it now then click the Scan for Devices button again.
If the device is connected but not found refer to the Diagnosing Basic Problems page for assistance.
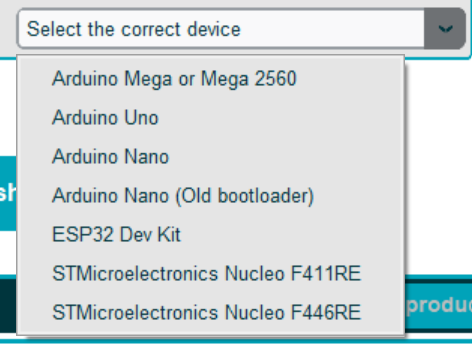
EX‑Installer will attempt to work out what type of Arduino you have connected, but some cases it will not be able to do so. (This is especially common with cheap clone devices.)
Check and select the appropriate board from the drop down list.
Once you have a port and device type selected, to proceed, click the Select product to install button.
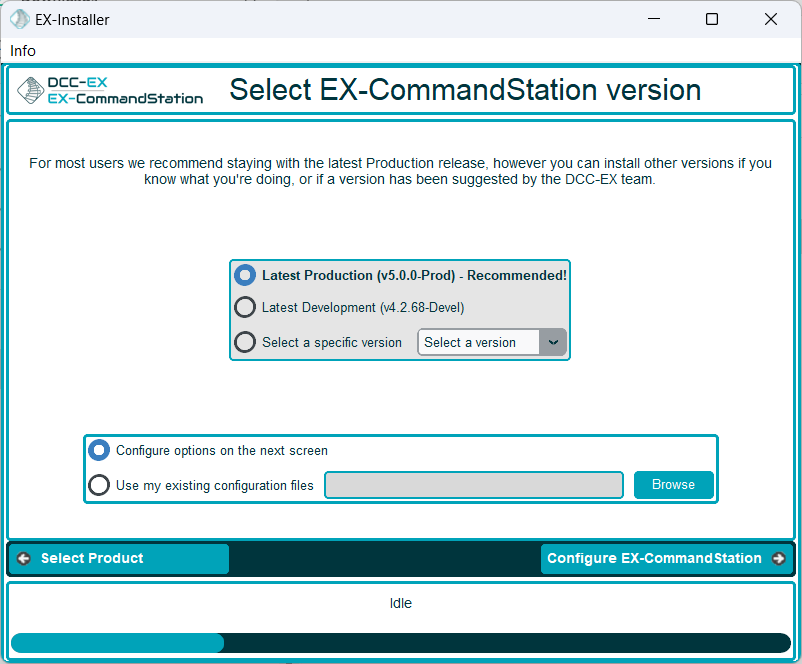
Figure 25 EX-Installer - Select EX-CommandStation version screen
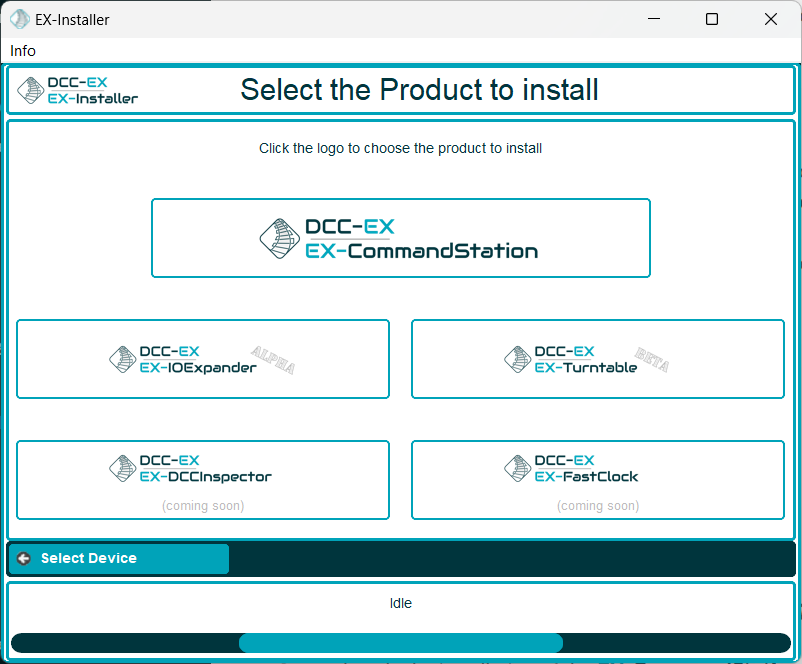
On this screen you need to select:
Which version of the EX-CommandStation software you wish to load
How you wish to configure the software
Which version
Select which version of the EX‑CommandStation software to load onto your hardware. If you are unsure, or unless you have been otherwise directed by the support team, we recommend you select LatestProduction.
How to configure
Select how you wish to configure your EX‑CommandStation. Unless you are updating a previous version that you manually configured, or want to manually make advanced configuration changes, select Configureoptionsonthenextscreen
If you do want to manually make advanced configuration changes, see the Using the Installer page for instructions on how to enable them.
If you have selected Configureoptionsonthenextscreen, to proceed, click the Configure EX-CommandStation button.
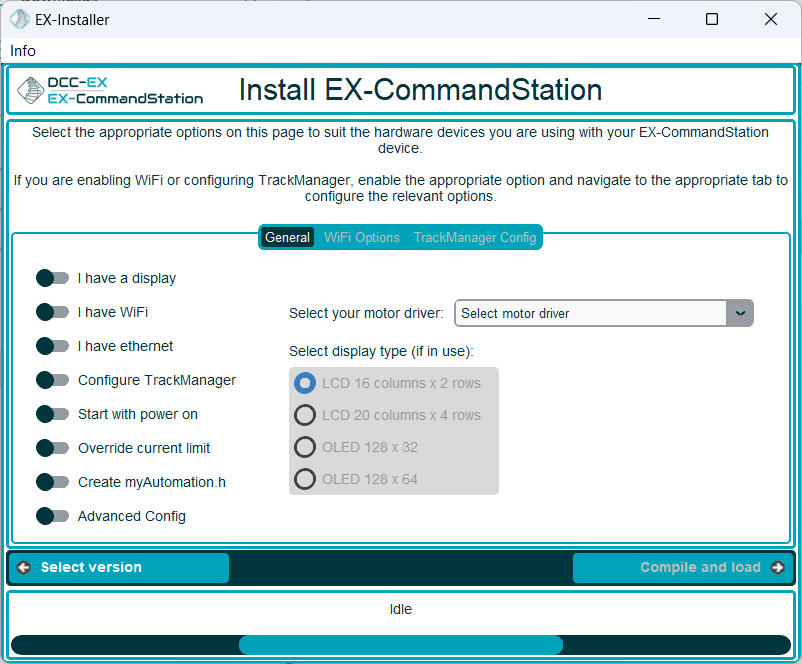
On this screen you can select some of the flexible and optional features of the EX‑CommandStation:abbr:
Motor Driver type
LCD or oLED display
WiFi
Ethernet
Set track modes
Advanced Config
Only the Motor Driver and WiFi will be covered on this page. If you have installed different hardware to that recommended, see the Using the Installer page for instructions on all the available configuration options.
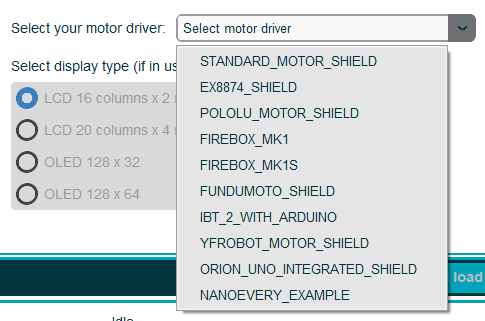
You must select the motor driver type that you have installed. The installer can’t detect this, so you must select the correct board or the EX‑CommandStation may not work. If you have installed the recommended Motor Driver, select STANDARD_MOTOR_SHIELD if you purchased the Arduino Motor Shield Rev3, or EX8874_SHIELD if you purchased our EX-MotorShield8874.
WiFi
If you have installed and optional WiFi board, or are using a microcontroller board with integrated WiFi, enable the IhaveWiFi option, which will present you with additional options.
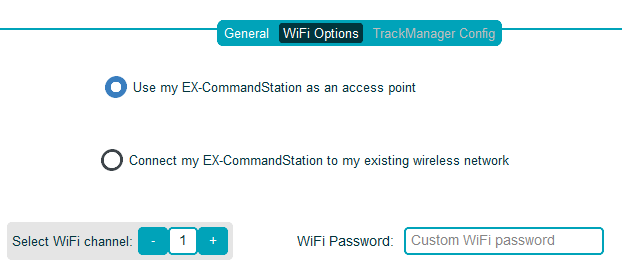
You can configure the WiFi for EX-CommandStation two ways:
Access Point mode You can configure for EX-CommandStation to have its own, completely isolated, WiFi Network. This is referred to as Access Point Mode. (Most useful if your layout is away from the house, or you transport your layout frequently.) To enable, select UsemyEX-CommandStationasanAccessPoint
Station mode The EX-CommandStation can be setup so that it connects to your existing home WiFi Network. This is referred to as Station Mode. To enable, select ConnectmyEX-CommandStationtomyexistingwirelessnetwork
If possible, choose a channel that is unused (or least used) by other WiFi networks around your location.
There are numerous phone apps that can help you determine which channels are being used by other networks. For Android, ‘Wifi Analyzer’ is one that works. For iOS ‘Netspot’ is suitable (you don’t need to purchase WiPry device they mention).
If UsemyEX-CommandStationasanAccessPoint is selected, two additional options are presented:
WiFi Password
WiFi Channel
WiFi Password is optional. We recommend you leave this field blank. If this field is left blank the password will default to “PASS_xxxxx” where ‘xxxxx’ will be the same as the SSID name that will be automatically configured.
WiFi Channel can be any value from 1-11.
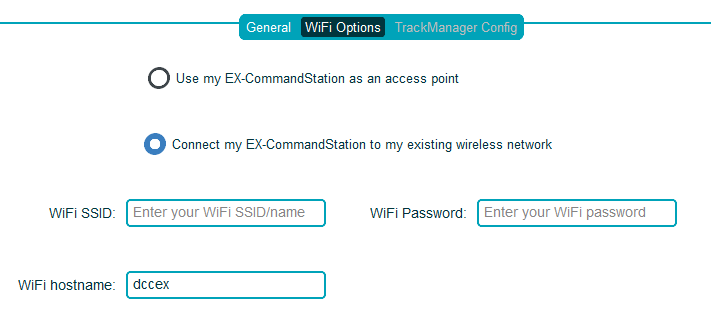
Connect my EX-CommandStation to my existing wireless network
Figure 29 EX-Installer - Configure Wifi - Station Mode
If ConnectmyEX-CommandStationtomyexistingwirelessnetwork is selected, two additional options are presented:
Wifi SSID
WiFi Password
Both are required, Though it is possible, but unlikely, that the WiFi Password for your network is blank. If so, leave the field blank.
WiFi SSID is the name of your home network.
WiFi Password is the password for your home network.
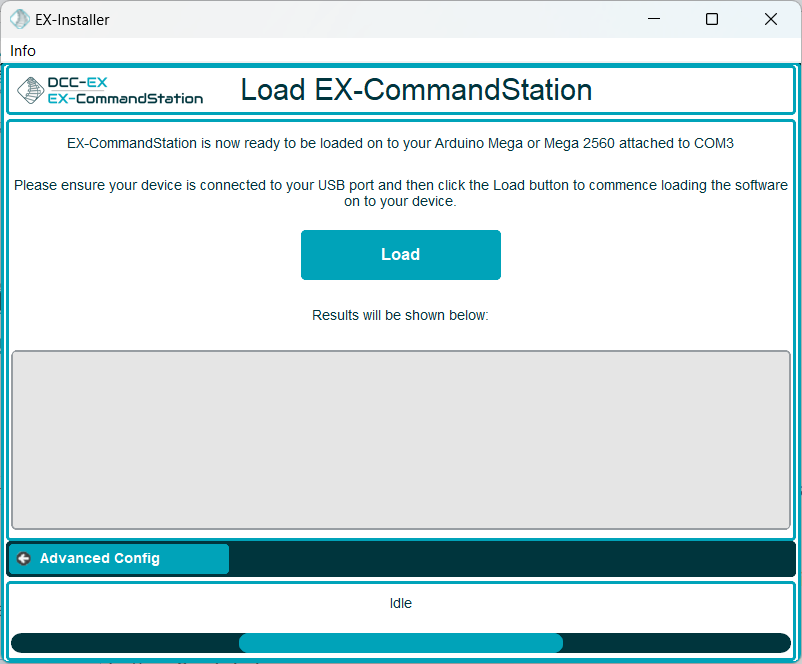
To proceed, click the Compile and Load button.
Note
See the WiFi Configuration page if you wish to find more detailed information on the the WiFi options.
The programming track is for programming only. Make sure you are on the main track if you expect your loco to move or respond to light or sound commands.
Click here or click the “next” button to learn how to select a throttle (controller) suitable to test and use your EX‑CommandStation.