![]()
Install using the Arduino IDE


The Arduino IDE is an “Integrated Development Environment”. Don’t let the name scare you away! It is really just a program that lets you open a project (like our EX‑CommandStation Software), compile the files into instructions the Arduino understands, and upload them from your computer into the Arduino using a serial cable. It is very easy to use.
Important
A word of caution on the approach of using the Arduino IDE to install the software:
While it is possible install the software using the Arduino IDE, we seriously DO NOT RECOMMEND IT for a Conductor or Tinkerer. It is an order of magnitude more complex, much slower, and with a very high probability of getting something wrong unless you really know what you are doing.
The EX‑Installer will meet 100% of the needs of a Conductor or Tinkerer with considerably less effort.
Those on the Engineer path (see Ready-to-Run or Do-It-Yourself - Choose your Level) may want to make changes to the code, or just learn more about how the EX‑CommandStation software works. At a minimum, you may need to change options in the ‘config.h’ file, or use the IDE’s “Serial Monitor” to monitor your Command Station, get logs if something is not working, or enter commands to test out features.
You can click on most of the images below to enlarge them
Download and install the Arduino IDE
Rather than go into details that are already covered in great detail on the Arduino web page, just follow the instructions in the following link and then return here.
Download the DCC-EX ZIP file
Use the link to either the ZIP or TAR file at the bottom of our GitHub page here:
Unzip the file into the Arduino IDE project folder
Find the ZIP file on your computer and unzip it. You should now have a folder with the entire DCC-EX project inside it called “CommandStation-EX”. Make sure this folder is at the root level with all your other projects. Note that the name of this folder MUST be “CommandStation-EX”! Do not change it. Because of the way the Arduino IDE works, the folder name must match the .ino file inside it.
Copy the config.example.h file (or rename it)
DCC-EX provides you with an example configuration file. This file holds settings that you can change for things like your choice of Motor Driver, WiFi login credentials, etc. Rather than a future update potentially causing you to lose any changes you make to your configuration, we give this file a different name and leave it up to you to edit if you need to. Simply rename this file to config.h.
Run the Arduino IDE
Start the Arduino IDE. You should see something like this:
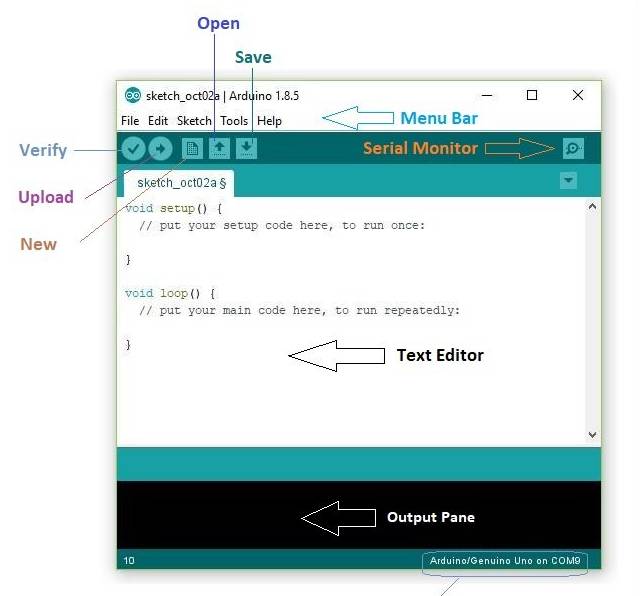
Fig 181: Arduino IDE
Open the CommandStation-EX Project
Choose “File -> Open” from the menu to open the file manager.
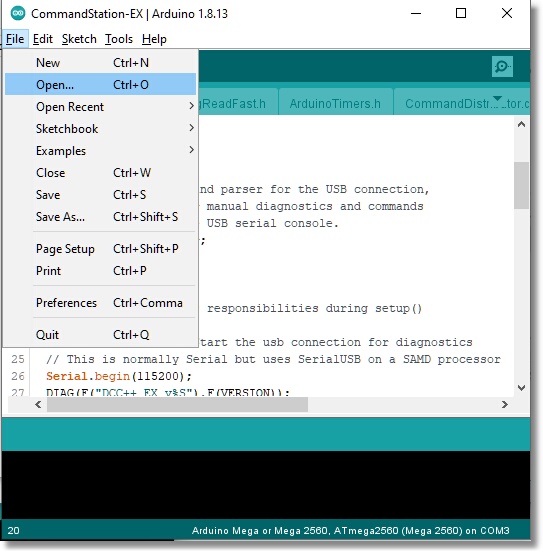
Fig 182: File Open Menu
Then click on the “CommandStation-EX” sketch folder to open it. Scroll down to the “CommandStation-EX.ino” file (It should have the round, blue Arduino logo on it) and open that file. We also provide example .ino files for those advanced users who want to use optional features like the “User Command Override” feature, high current motor boards, etc. But for now, and for most users, this will be all you need.
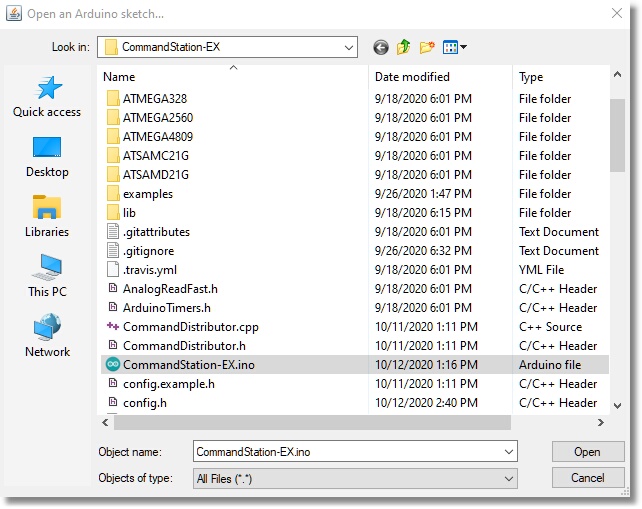
Fig 183: Find the CommandStation-EX.ino file
Edit the config.h file (optional)
If you are using a Standard Motor Driver, and if optionally using one of the supported WiFi boards and want to connect directly to the EX‑CommandStation in Access Point Mode (AP) from your WiFi controller, there is nothing more to do! Just upload the software to the EX‑CommandStation in the next step.
If you are using a different motor driver (shield or board), or if you wish to connect your Command Station to your home network instead of having a separate access point, follow the instructions in the config.h file
If you want to take a look at this file or make a simple change, just open the file and take a look. You should see many files open in tabs at the top of the Arduino IDE window. Find the down facing triangle near the upper right of the window and click on it to open the entire list of files. Scroll down to near the bottom and click on the “config.h” file you renamed in the previous step to open it in the editing window. If you are sure of your changes, make sure to click on “File -> Save” from the top menu to save them.
Select the board type and COM port
Before you attempt this step, make sure that you have everything connected properly from the assembly page. And a final reminder to make sure you cut the Vin trace on the bottom of the Standard Motor Driver. Ready? Proceed.
Connect the computer to the Arduino with the USB cable. Note the 5V coming from your computer/Raspberry Pi is enough to power the Mega, since it bypasses the regulator that converts your 7-9V power supply down to 5V, and goes right to the 5V bus on the board. So don’t be alarmed by lights on your Arduino.
From the “Tools” menu select the “Board” menu, then “Arduino AVR boards”, and then “Arduino Mega or Mega 2560”.
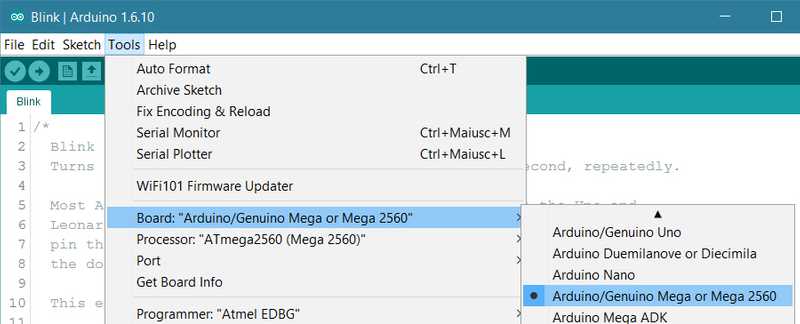
Fig 184: Select your board type
Then select “Processor” and make sure it says “ATMega2560”
Last, select “Port” and find the port on your computer that recognises the Arduino. If you don’t see a port listed there and are using a clone board, you may have to install a driver for a CH340 USB chip that is on these boards: see here Drivers for the CH340 
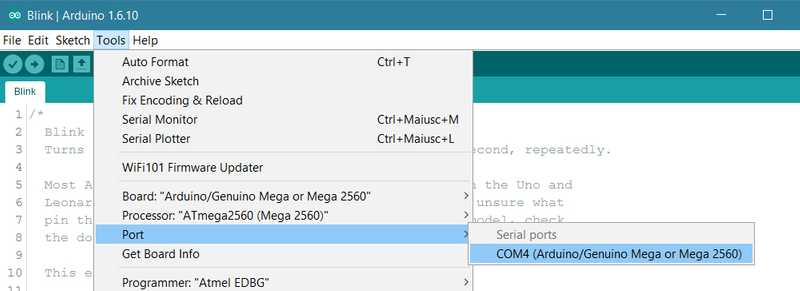
Fig 185: Select the correct COM Port
Upload the software
Click on the Upload button near the top left. It is a circle with a right arrow, next to the Compile button that looks like a check mark.
Fig 186: Upload the Command Station Software to the Arduino
The Arduino IDE will go through a compile process which will build all the files into an application the Arduino can run, and then upload it. You may see many lines of logging as it finishes its task. When done, it will upload the file to the Arduino which you may see as some lights blinking on the Arduino. Make sure there are no errors in the log window, and that it shows “done uploading” in the status bar and “SUCCESS” and a listing of how much memory is used on the Arduino in the log window.
Don’t unplug the serial cable yet!
Plug in your power adapters
You should already have the 7-9V adapter plugged into the Arduino, and the 12-16v [1] adapter plugged into the motor driver. Now you can plug both of them into the power socket. Nothing should happen. Be sure that nothing bad happens, like smoke rising from the board or the boards getting hot. If anything seems wrong, unplug the power adapters immediately.
Use the Serial Monitor to do a quick test
Note
The programming track (PROG) is for programming only. Make sure you are on the MAIN track if you expect your loco to move or respond to light or sound commands.
The Arduino IDE has a built in Serial Monitor. That means that in addition to uploading updates to your EX‑CommandStation, we can interact with the Command Station. Select “Tools -> Serial Monitor”, or click on the “serial monitor” icon near the upper right of the window.
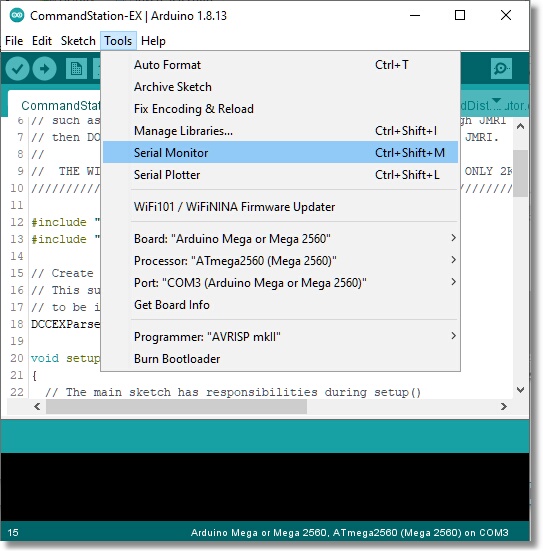
Fig 187: Open the Serial Monitor
Make sure the baud rate at the lower right of the window is set to “115200”. This is the data communication speed, equivalent to 115.2kb/s! Make sure the dropdown next to that says “Both NL & CR”. That makes sure you send a ‘new line’ command and ‘carriage return’ which the Arduino expects.
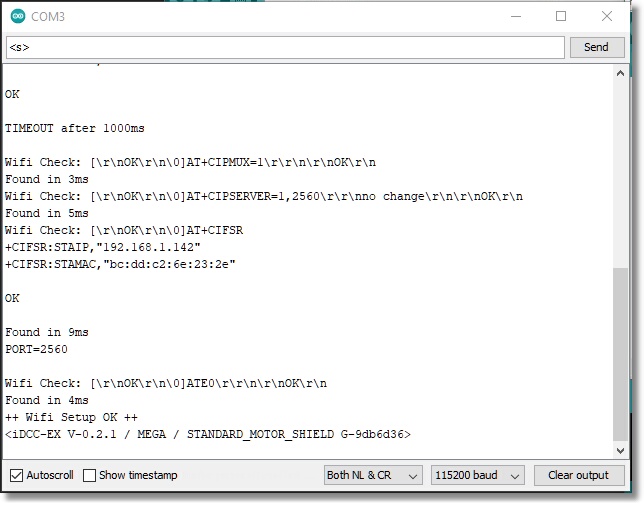
Fig 188: Serial Monitor
You should see log information immediately display in the window. If you have a Network shield or WiFi shield connected, you will see the Command Station setup its AP, or connect to your network if you gave it your credentials. If you don’t have a network, that’s fine; the Command Station will sense that, the network test will fail, but everything else will be working as it should.
Type in a command or two
There is an entire language that EX‑CommandStation understands. We call this the DCC-EX API for “Application Programming Interface”. If you are interested, the list of all the commands is here in the DCC-EX Wiki. Let’s just try two commands to make sure everything is working.
All DCC-EX commands begin with a < and end with a >. In the command window, type <1> and press the send button, or Enter on your keyboard. Power should come on to the main track. You should see 2 red LEDs light on the “A” power output of the Motor Shield.
Now enter <s> (lowercase). You should see status information for your Command Station appear in the log.
Turn off the power to the track by sending <0> to the CS. That is a “zero”.
Exit the Arduino IDE software.
Run your trains!
Make sure power is off to the track
Make sure your loco is DCC ENABLED (not DCC Ready! DCC Ready just means it has the plumbing inside the loco to install an optional DCC decoder, but it is NOT yet DCC compatible)
Put your loco on the MAIN track. The loco cannot move or respond to non-programming commands on the PROG track!
Now run EX-WebThrottle directly from our EX-WebThrottle web page. As described on that page, ensure that you are using Chrome version 89 or above. Note that you can run the throttle from your browser, and/or install it locally from its own menu.
You can also download our EX‑WebThrottle found at EX-WebThrottle on GitHub and run it in your browser. Again, make sure you are using a Chrome based browser version 89 or above.
The rest of the instructions show you how to use EX‑WebThrottle. You should be able to find the Command Station by its serial port and enable it, turn on the track power, then acquire your loco by its ID. After that, you should be able to use the throttle slider and function buttons to operate your locomotive!
You can also watch the EX-WebThrottle Video.