ESP32 (Recommended)
Espressif ESP32 series
Espressif have for some years now made impressive WiFi and Bluetooth capable microcontroller modules. DCC-EX has made use of their original ESP8266 offering as the means to provide WiFi capability to the EX-CS.
Espressif’s newer ESP32 range has either WiFi alone or WiFi and Bluetooth capability built in. Espressif’s product naming is not the easiest to follow, but DCC-EX has been ported to the original ESP32-WROOM-D0WD module, which has the following capabilities:
Dual Xtensa 32-bit LX6 CPU cores
448KB of ROM for boot and core functions
520KB of RAM
WiFi: 802.11b/g/n up to 150Mbps
Bluetooth v4.2 BR/EDR and BLE
WiFi STA mode and AP mode
WiFi WPA/WPA2/WPA2-Enterprise/WPS support
Encryption AES/RSA/ECC/SHA
IPv4, IPv6, SSL, TCP/UDP/HTTP/FTP/MQTT
Hardware interfaces: SD-card, UART, SPI, SDIO, I2C, LED PWM, Motor PWM, I2S , IR, GPIO, capacitive touch sensor, ADC, DAC, Hall sensor, temperature sensor
The appeal of the ESP32 series is that they are very compact and come with WiFi capability built in. However, during porting to the ESP32-WROOM-32 we discovered they have some limitations, namely:
WiFi is implemented in a blob of code from Espressif, which takes over interrupts, making DCC signal generation difficult
To generate a clean DCC signal you need to program the special RMT hardware, normally used for IR remote controls
Once we had done this, the DCC signal was very good
The port is currently in very active beta testing, and is for the most part very reliable. At present, the hardware modifications needed for the ESPduino32 and connectivity challenges with the various Devkit modules makes the hardware for tinkerers and engineers only.
Note
DCC-EX can only run on the ESP32-WROOM-32 module, and none of the other ESP32 modules (S2, S3, C3 etc.) are supported at present. This is because other ESP32 modules do not have the necessary RMT hardware, or do not have enough such hardware to run DCC-EX.
ESP32-WROOM-32 boards tested
The ESP32 development boards that have been tested include the WeMos D1 R32/ESPDUINO-32, the GRobotronics ESP32 DEVKIT V1, the OLIMEX ESP32 DEVKIT LIPO, and the LILYGO® TTGO T-Energy T18 V3.0 ESP32-WROVER-E development board. Note that although the last one is an ESP32-WROVER-E board, not the WROOM, it does appear to work for one user, but more testing is required.
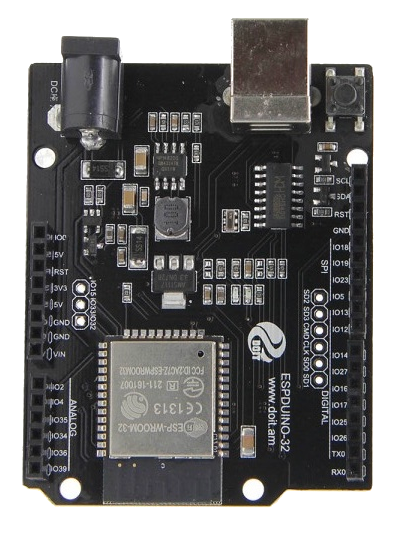
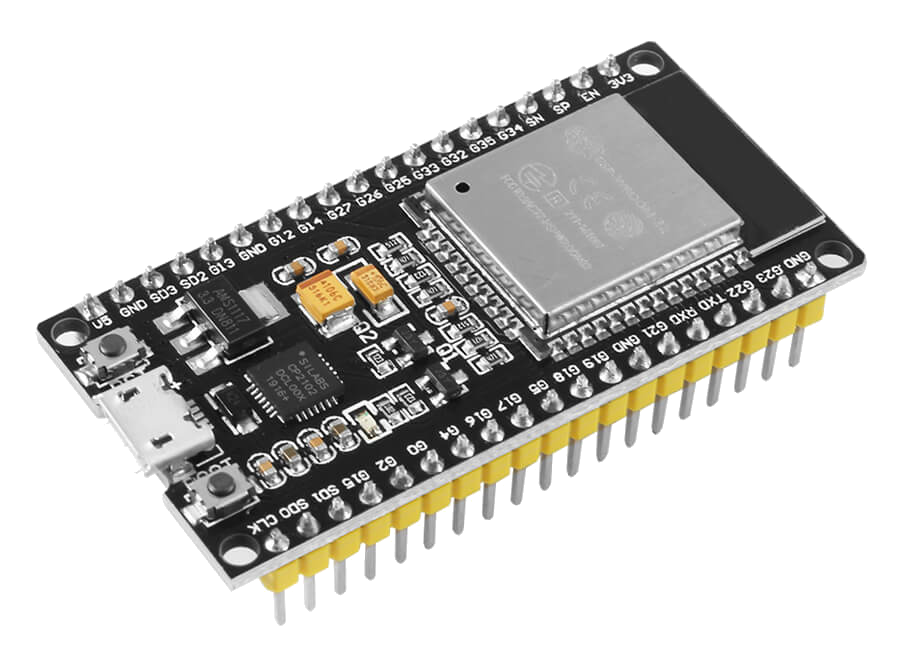
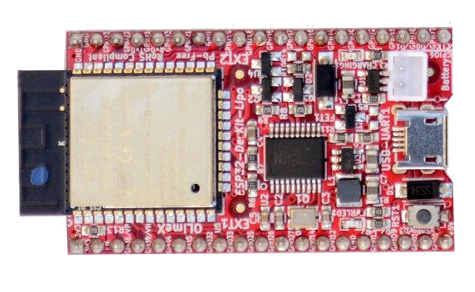
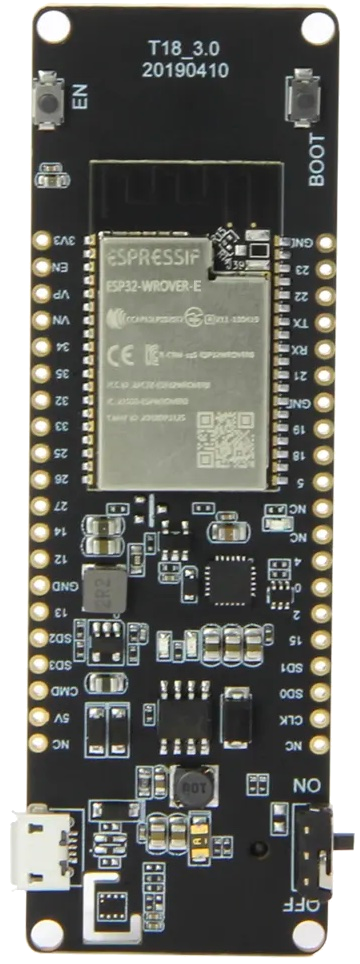
WeMos D1 R32/ESPDUINO-32 board
The recommended hardware for now is the WeMos D1 R32, also referred to as the ESPDUINO-32. This consists of an ESP32-WROOM-32 module mounted on a UNO form factor board with UNO R3 style connectors. Pictured here:

Sharing the same form factor as the Arduino UNO it can make use of the Arduino Motor Shield R3 or the Deek-Robot Motor Shield. Note however that there are some hardware issues to be aware of, and to remedy before using this board.
It is a bit frustrating to find the following obvious hardware errors in popular boards like the ESPDUINO-32:
Pullup voltage to the IO0 pin is too high (4.2v instead of 3.3-3.8v) which leads to unreliable WiFi!
IOREF pin does not output 3v3, but instead breaches the UNO R3 specification and outputs 5V!
A0 and A1 analog input pins for current sensing should not be used, as they cannot be used on ESP32-WROOM modules when using WiFi!
All these issues can be fixed with a soldering iron and/or a jumper but that’s not what one expects from a released product.
Hardware setup notes for a WeMos D1 R32/ESPDUINO-32 EX‑CommandStation
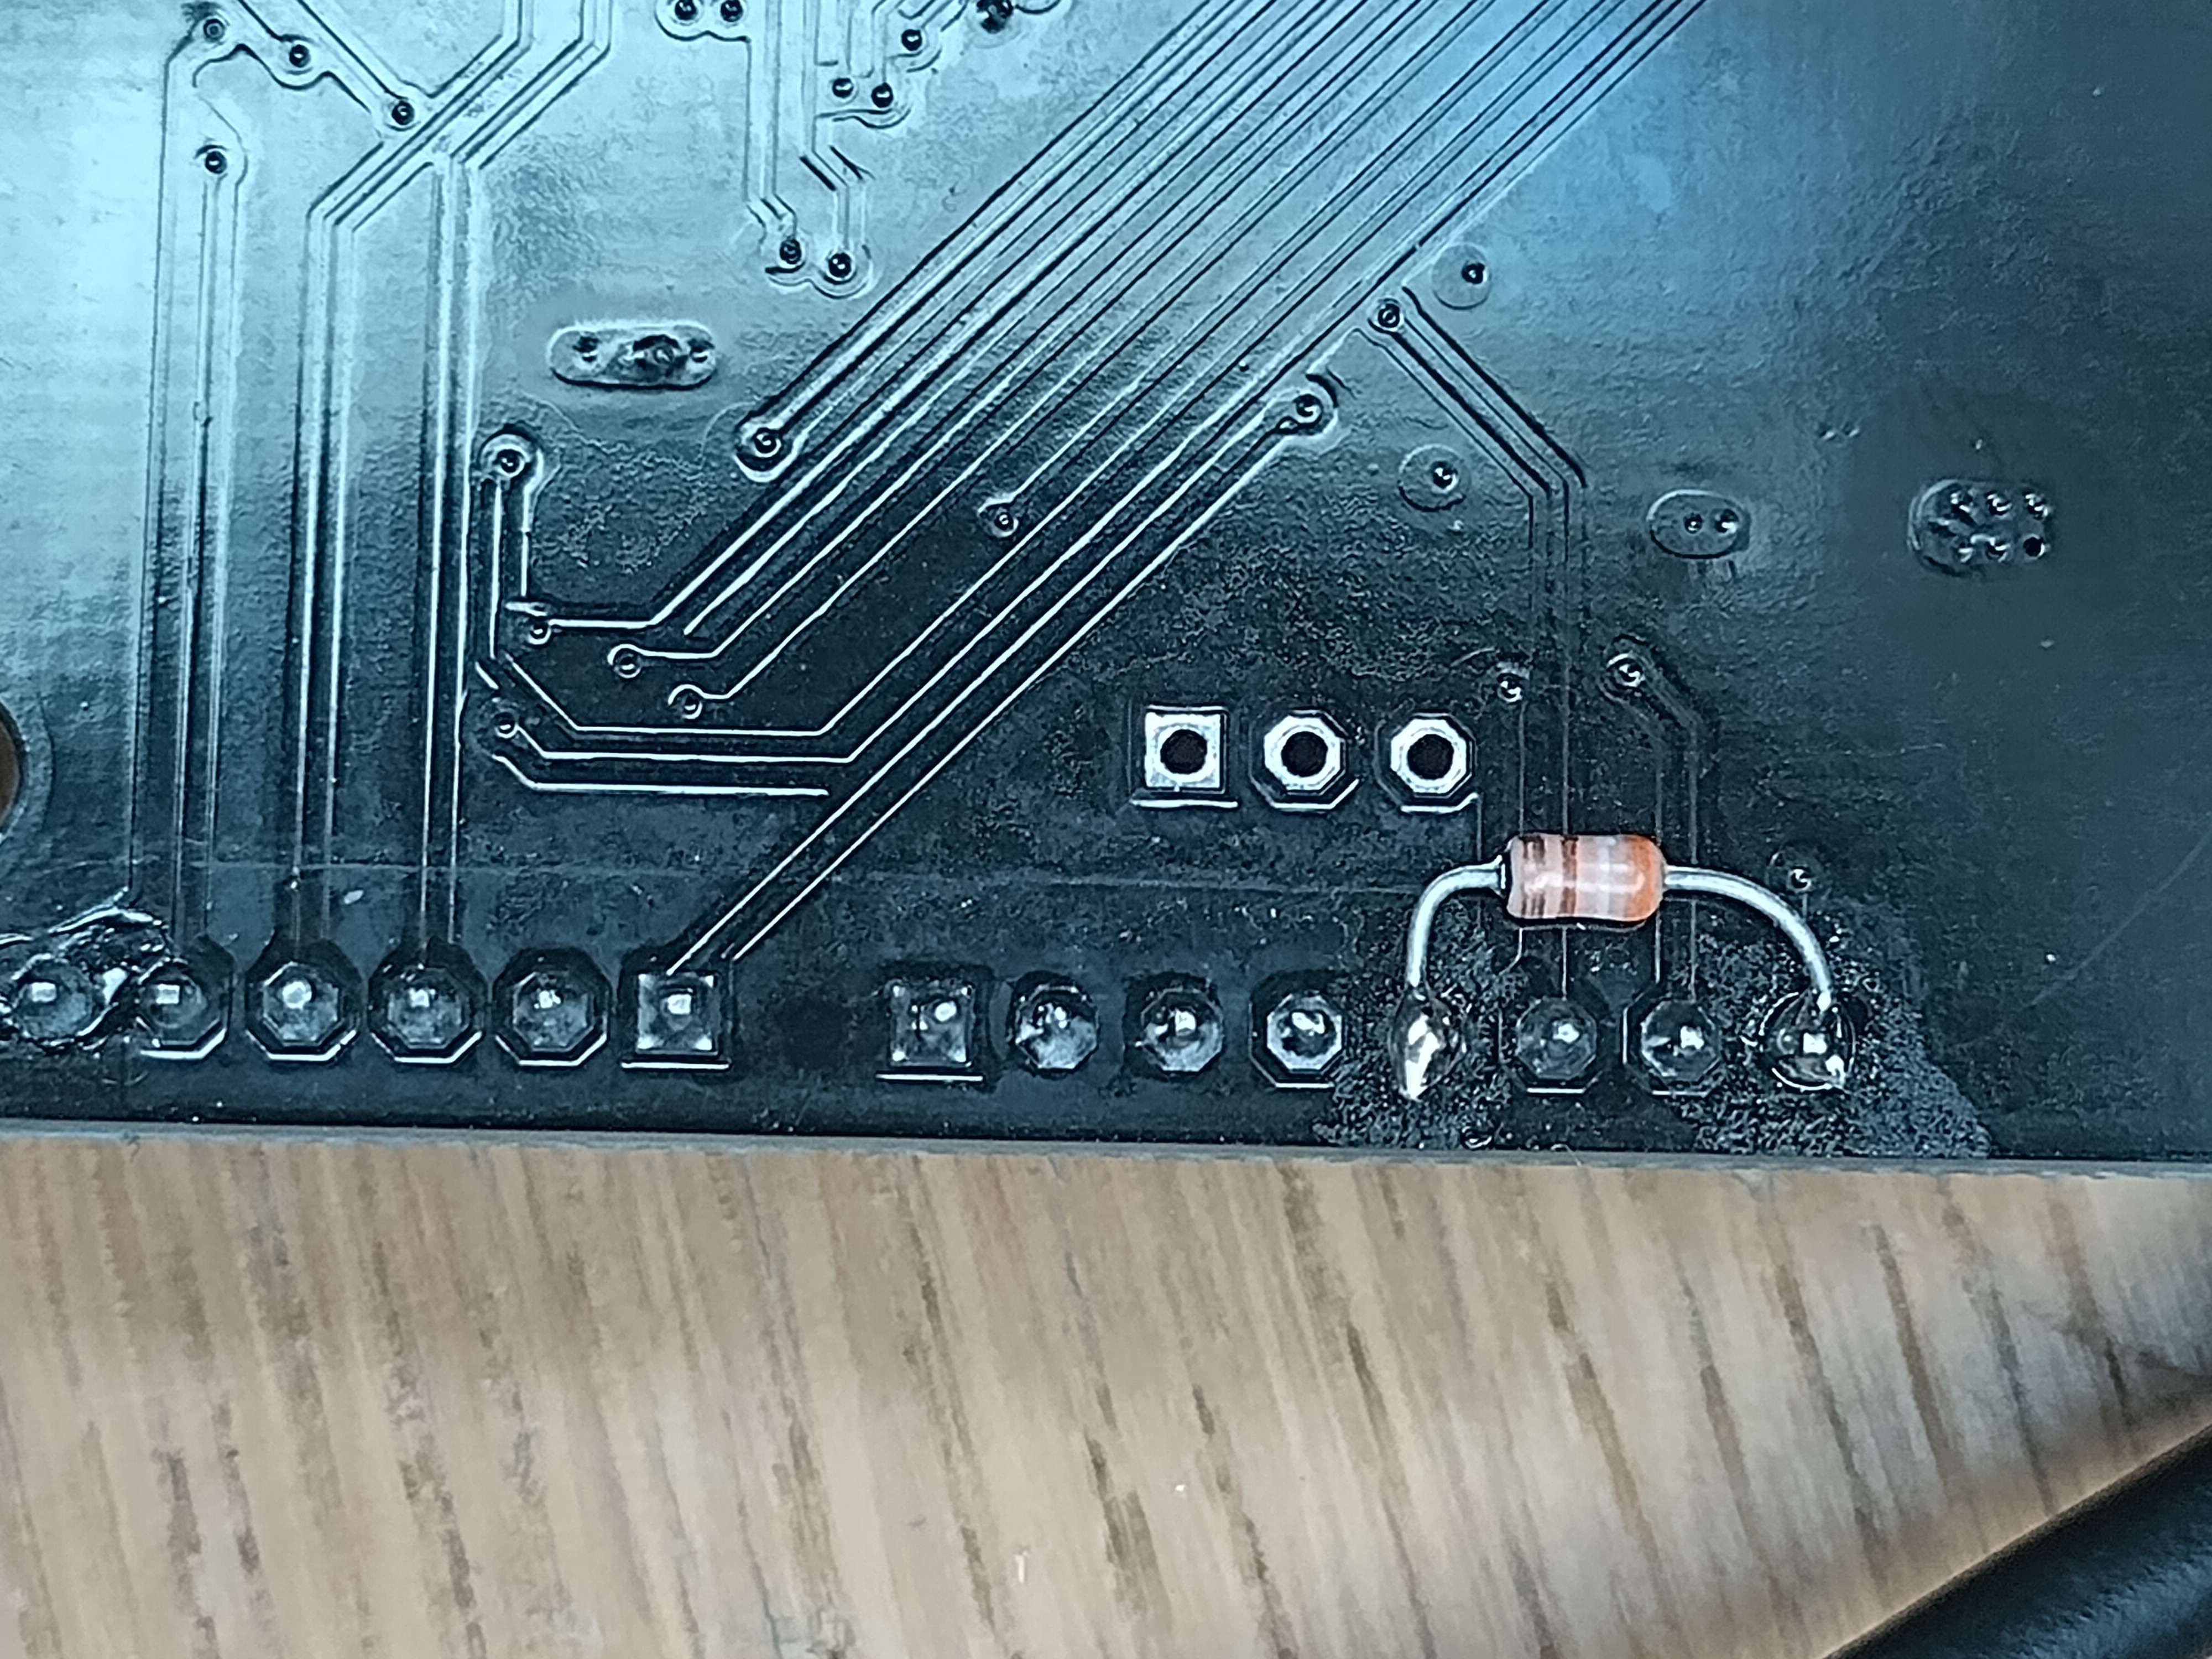
To fix the IO0 pin voltage, install a resistor of between 250 to 300 Ohms between 3.3V and IO0 to pull it back down to 3.3V. This is easiest to do on the back side of the board, like so:
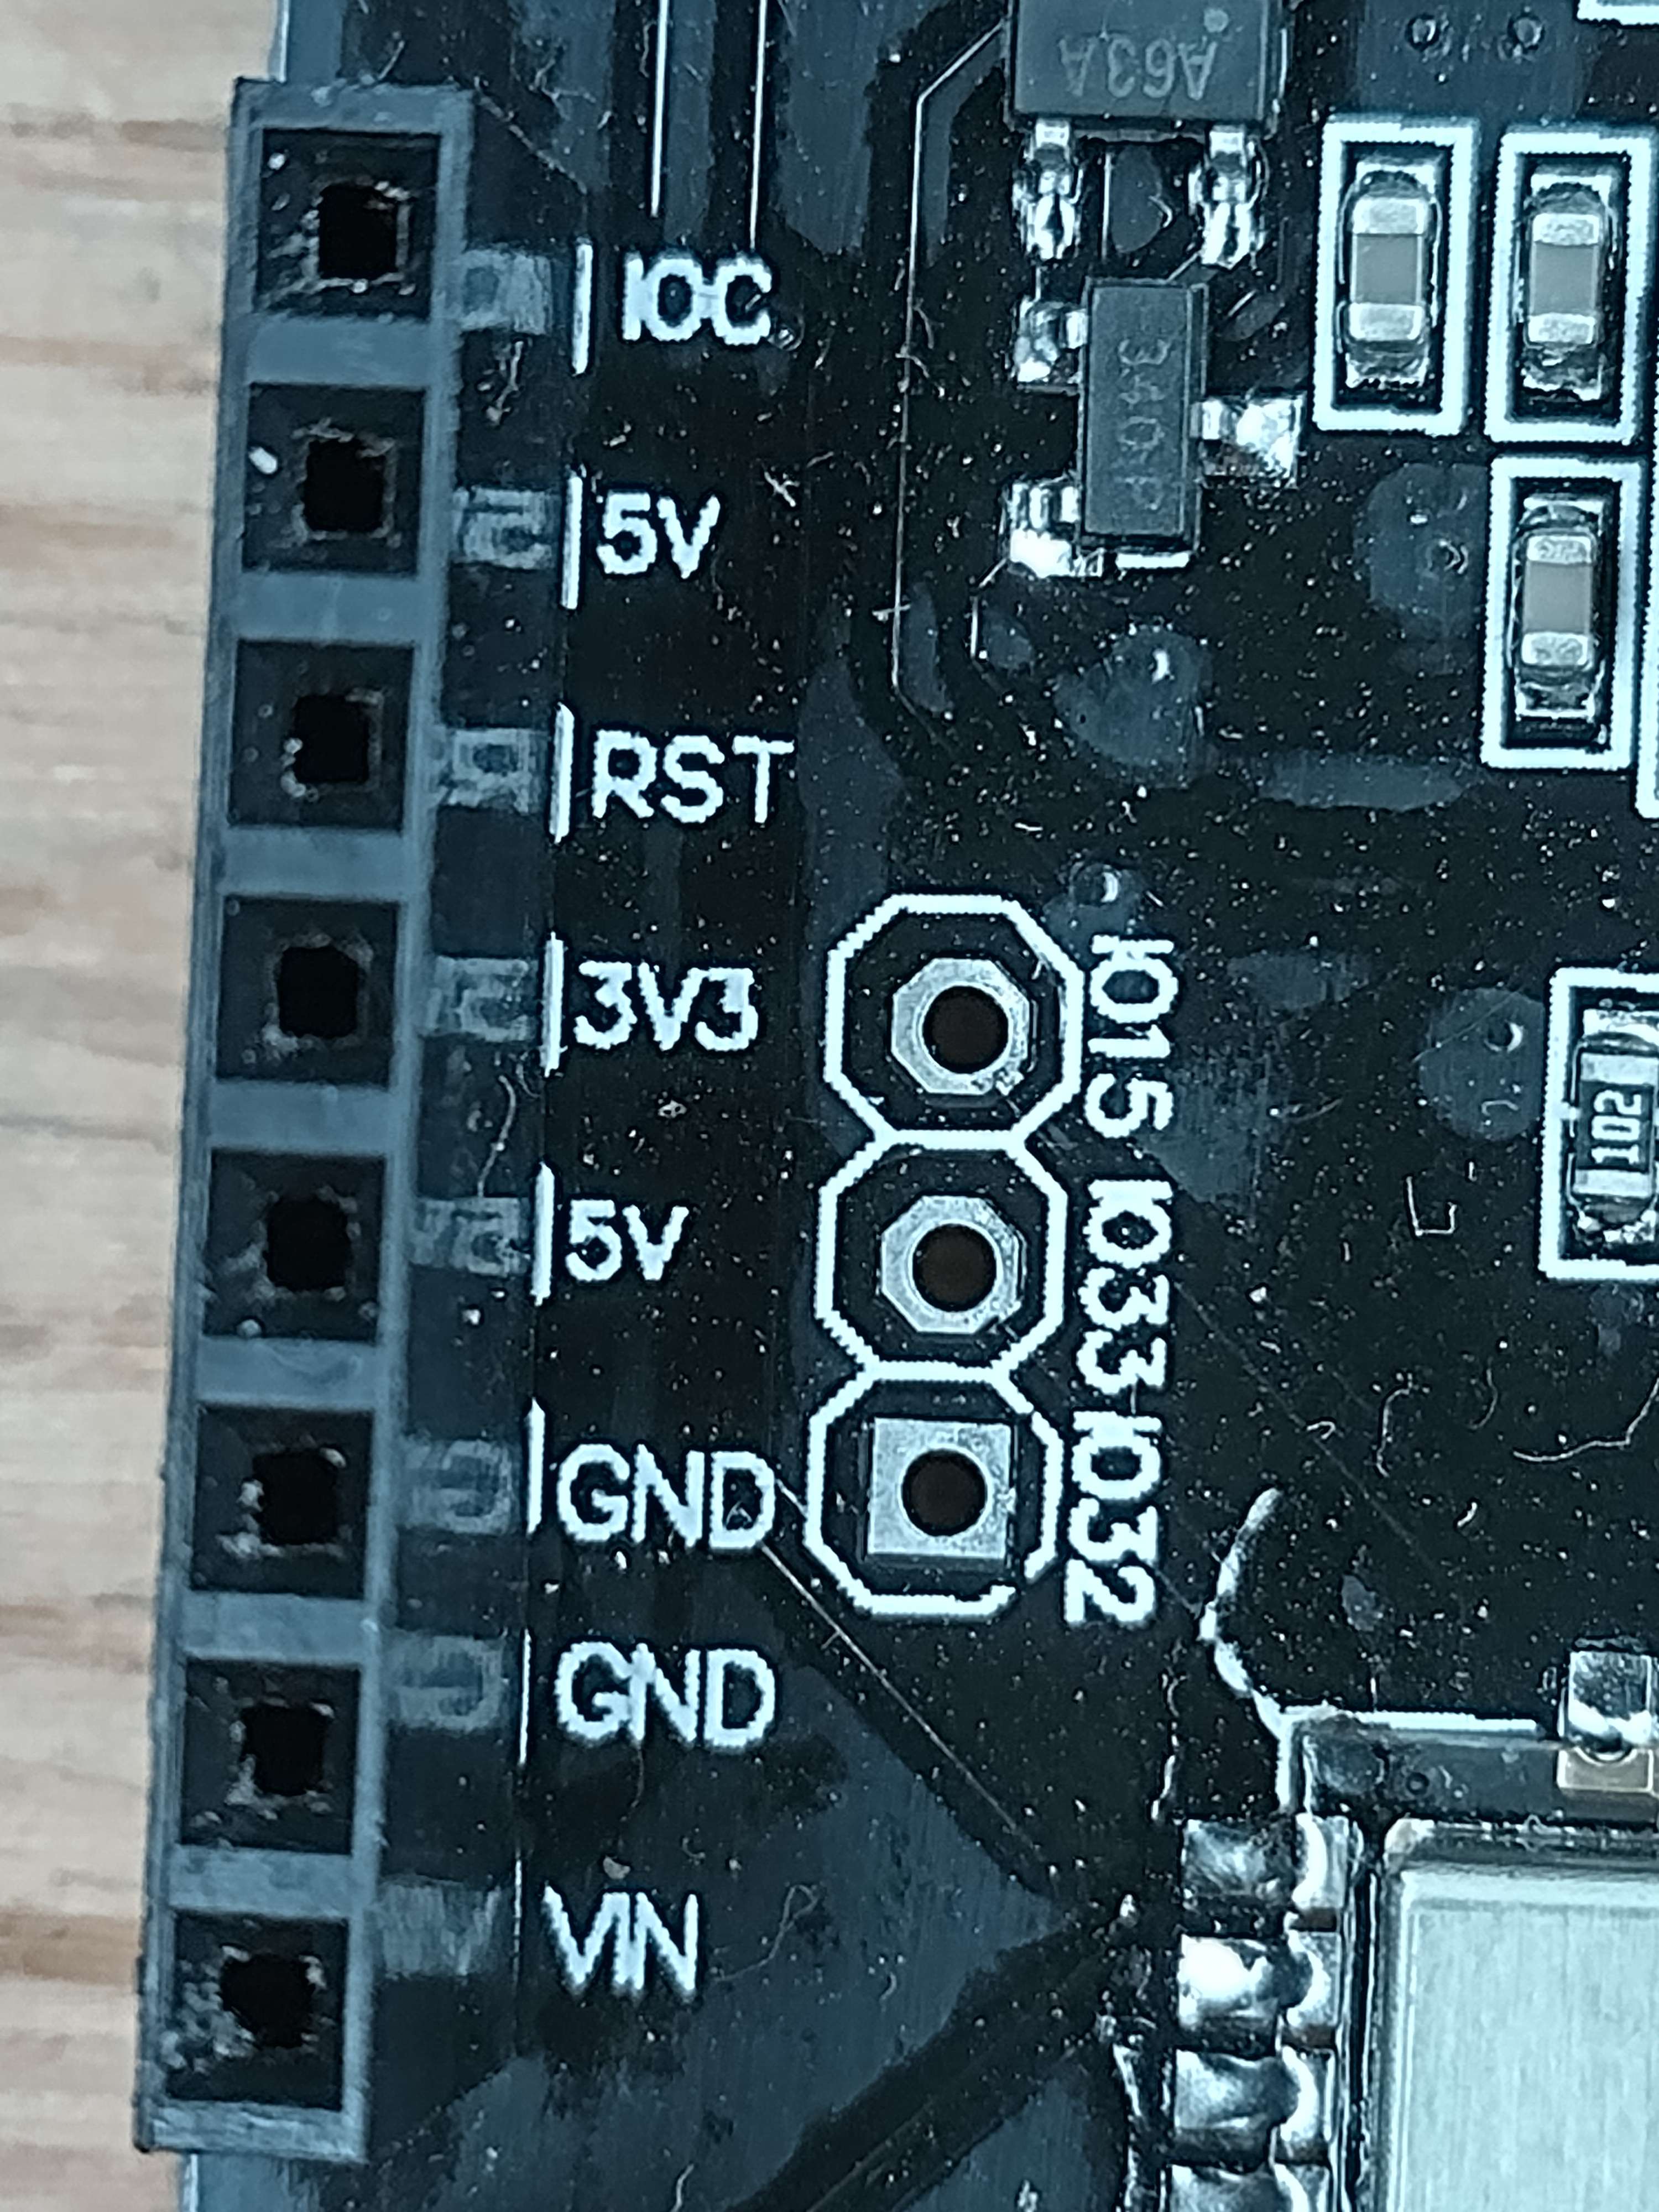
From top to bottom the pins are: IO0, 5V (incorrectly labelled IOREF on this board, so not Arduino UNO R3 compliant), RESET, 3.3V, 5V, GND, GND, VIN as seen here:
Using an Arduino Motor Shield R3
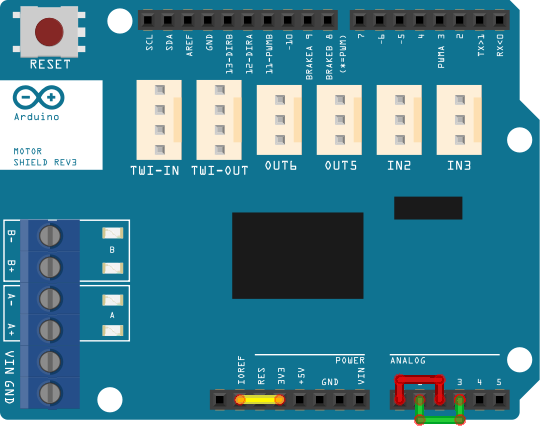
To avoid damaging the ESP32’s analog inputs, the IOREF pin on must be bent outwards or cut so it will not go into the ESPDUINO-32 socket. Then use a jumper from the 3.3v pin to IOREF on the Motor Shield itself.
For DCC current sensing bend or cut the A0 and A1 pins because by default they are connected to GPIO2 and GPIO4 on the ESP32 which are not useable at the same time as WiFi. Instead, on the top of the Motor Shield connect A0 to A2 and A1 to A3 via jumpers. This will then automatically work when you select STANDARD_MOTOR_SHIELD as the MotorShield in config.h because the definition is in place when ESP32 is selected as the build target.
Additional information on the use of L298 Clone motor shields
Bend the IOREF pin and jumper to the 3.3v pin, as is done for the Genuine Arduino Motor Shield R3.
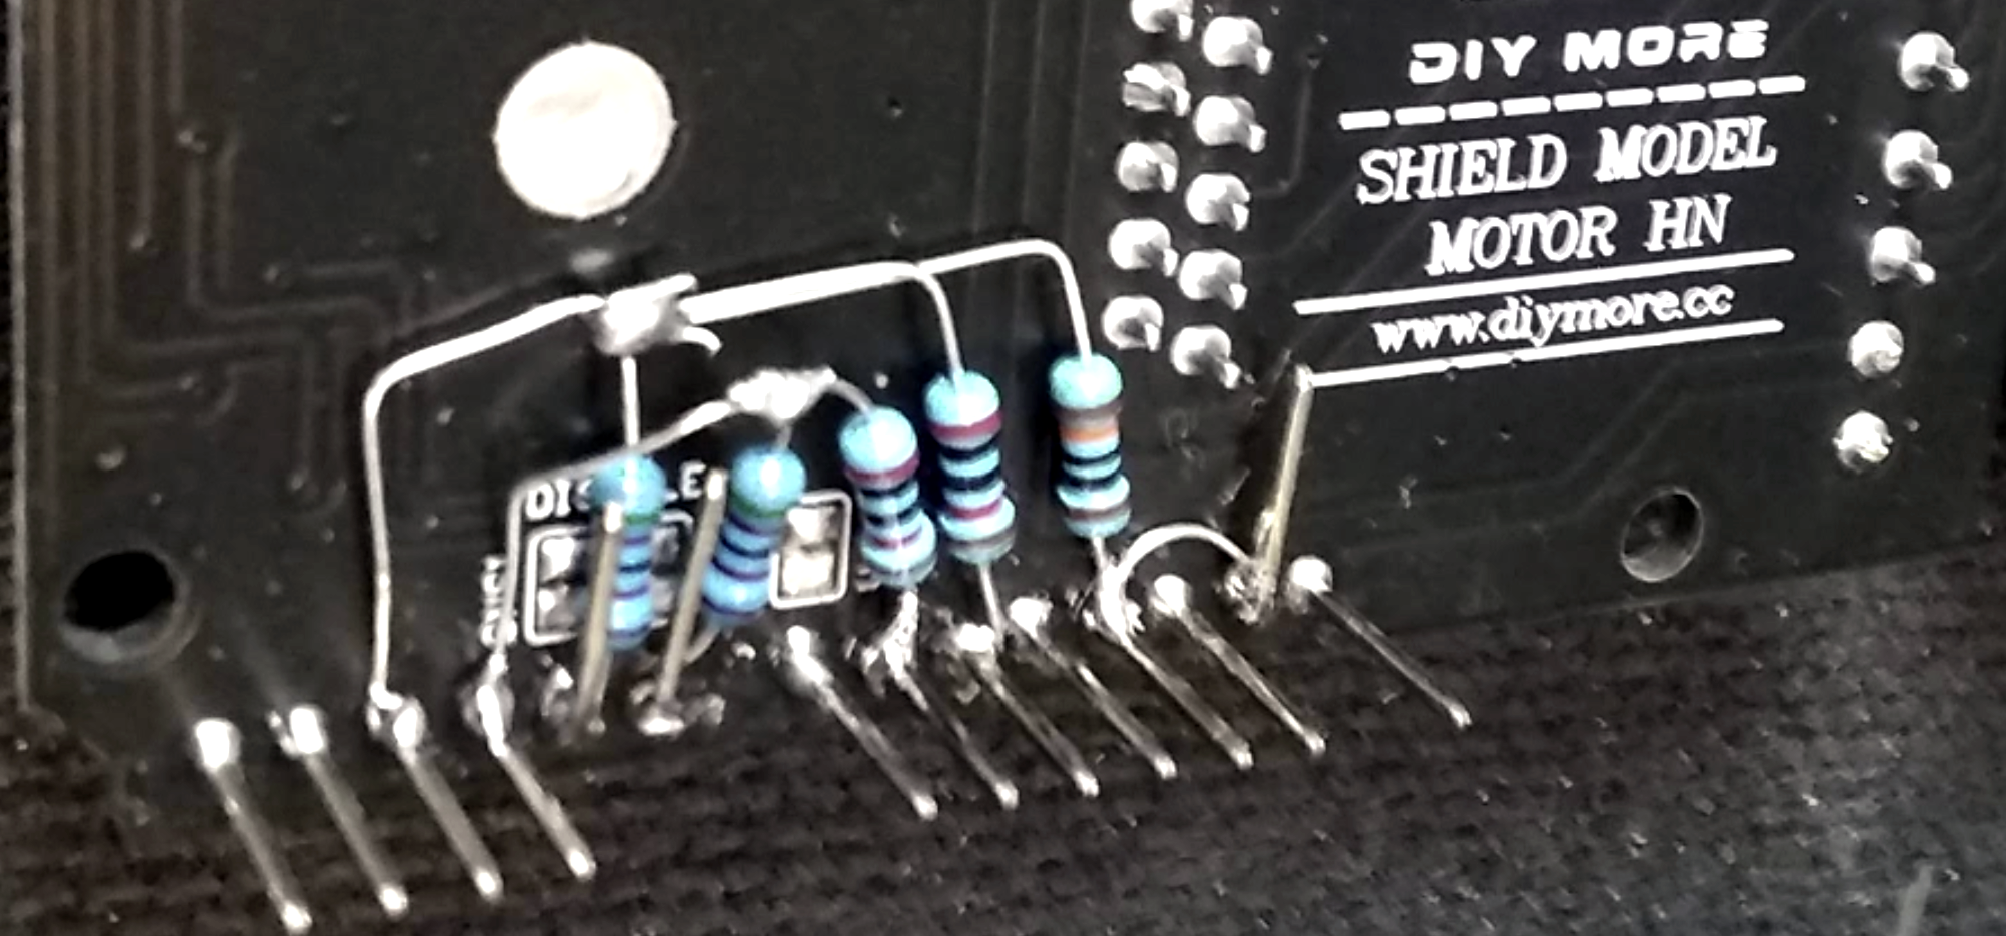
For current sensing, bend the A0 and A1 pins. Current sensing will use A2 and A3, but clone motor shields require modifications.
> Add voltage divider resistors.
Track A - - 5k/20k MAIN
5k - A0-A2
20k - GND-A2
Track B - - 5K/20K/100K PROG
5k - A1-A3
20k - GND-A3
100k - 3v3-A3
> The voltage divider resistor circuit is also utilizing the Schottky diodes present on pins A2 and A3 to limit ADC input voltage.
> Note: the 100k resistor provides a voltage boost, which will result in overcurrent issues on the
programming track. You can use <D PROGBOOST> to forego the 250mA trip current, or update the
code in MotorDriver.h
Using a DCC-EX EX-MotorShield8874
To avoid damaging the ESP32’s analog inputs, alter the IOREF jumper on the bottom of the EX-MotorShield8874 to take power from the 3v3 supply instead of IOREF as described in Power Configuration PCB Jumpers.
For DCC current sensing with the EX-MotorShield8874, use the alternate pin assignment jumpers for current sense to switch sensing to A2/A3 as described in Alternate Pin Assignment PCB Jumpers. Once this is done, simply select EX8874 in config.h as your MotorShield.
Finally, the ESP32 needs more testing and development of a DCC-EX I2C non-blocking native driver implementation in particular. I2C peripheral performance will be limited until such time.
WeMos D1 R32/ESPDUINO-32 with Microsoft Windows - CH340 drivers
When using the WeMos D1 R32/ESPDUINO-32 board with Microsoft Windows, you will need to install the CH340 USB drivers in order to be able to upload software to it and use the Serial Monitor in either PlatformIO or the Arduino IDE.
Building DCC-EX for ESP32
The easiest way of building DCC-EX for the ESP32 is via EX-Installer by selecting the ESP32 option. Click here for EX-Installer installation instructions.
Adding ESP32 support to VS Code and PlatformIO
When using VS Code and PlatformIO it will auto-configure from the entry in the platformio.ini file when you select the ESP32 target to be built.
Adding ESP32 support to the Arduino IDE
In order to compile for the Espressif ESP32 platforms, you will need to add the board definitions to the Arduino IDE. To do this, follow the instructions on the official Espressif guide.
Note
ESP32 Espressif boards package version 2.0.17 is required.
Select board: ESP32 Dev module


