JMRI (Java Model Railroad Interface)


JMRI is quite a powerful suite of software applications, and can be as simple or as complex as you wish to make it.
On this page, we will focus on utilising JMRI as a throttle only.
Connecting to your EX-CommandStation
The first thing you need to do is connect your EX‑CommandStation to JMRI.
Follow these instructions outlined in the JMRi help page  to get connected.
Create a new throttle
Once you have your connection to JMRI configured, you can launch a new throttle using either the DecoderPro or PanelPro applications.
DecoderPro
In DecoderPro, select “New Throttle” from the “Actions” menu.

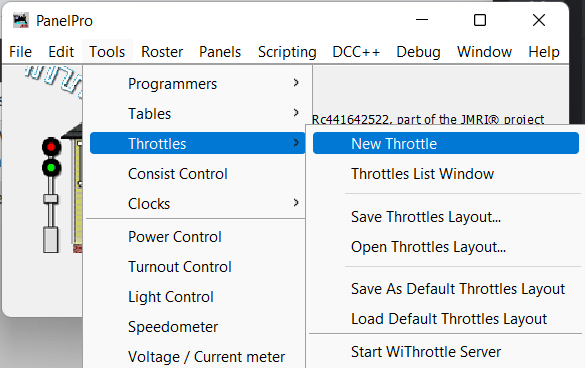
PanelPro
In PanelPro, from the “Tools” menu, select “Throttles” -> “New Throttle”.
Select and control a loco
At this point, you should have your JMRI throttle window open ready for action:
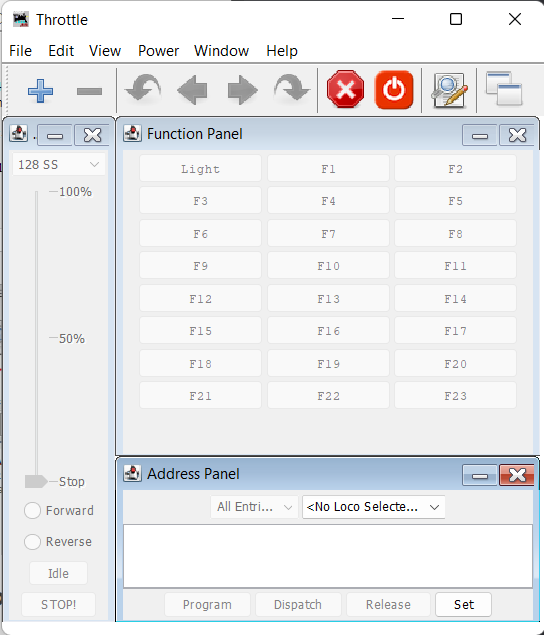
To select and control a loco from here, you need to:
Ensure track power is turned on using the Power button at the top of the window, or selecting “Power On” from the “Power” menu
Type the address of your loco in the “Address Panel” then press the Set button
You can now use the throttle slider, forward, reverse, Idle, and STOP! buttons to control your loco
Use the buttons in the “Function Panel” to control your various loco functions also
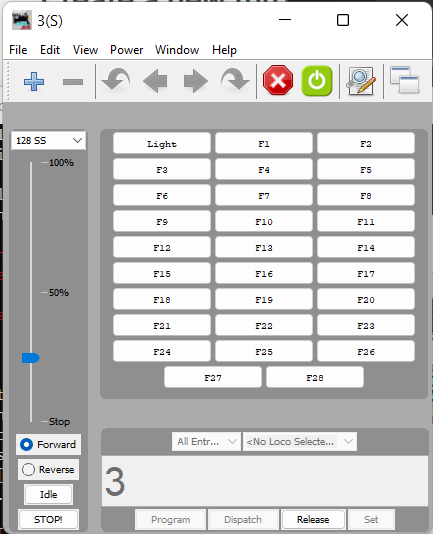
Here we show a loco at address 3 selected, with track power turned on, and running in a forward direction at 25% speed:
EX-CommandStation & JMRI DecoderPro Programming Station
If you would like to utilise the combined power of EX-CommandStation & JMRI DecoderPro Programming Station, please download and review the Comprehensive DCC-EX & JMRI DecoderPro Getting Started Guide PDF.
Further reading
If you’re keen to learn more about JMRI, then we highly recommend going to the JMRI website and reading further on the features and possibilities available.